Communication methods, default targets, and selection or remember options in the setting manager are application-wide SDK settings; retain existing settings that meet requirements and adjust them only when a change is needed.
For initial configuration of separate-device access, use the following steps:
Enable the required communication transport(s)
Choose a connection approach (Direct or Discovery)
Specify or select the target device
Initiate transactions and let the SDK handle the connection
The SDK supports multiple communication transport methods. The availability and configuration approach vary by platform.
Android
On Android, the SDK supports multiple transport methods.
RetailerSettingManager.enableConnectMethod(ConnectionMethod.USB, ConnectionMethod.LAN);Windows
The Windows SDK supports LAN, USB, and UART. Enable the methods used by the application through the setting manager:
RetailerSettingManager.EnableConnectMethod(
    ConnectionMethod.LAN, ConnectionMethod.USB, ConnectionMethod.UART);
iOS
The iOS SDK currently supports only LAN communication.
Configure the LAN channel through the setting manager after initialization:
RetailerSettingManager *settings = [RetailerSettingManager sharedManager];
[settings setCommunicateType:CommunicateTypeHTTP state:YES];
[settings setCommunicateType:CommunicateTypeBluetooth state:NO];
The Bluetooth enum is used here to disable that channel. Its presence in the framework does not extend the supported communication methods listed for this integration.
Configure the communication methods required by the application explicitly. Enabling a method makes it available for communication; discovery finds candidates, and target selection decides which terminal receives a request. Enable multiple methods when the selected strategy needs them. Validate default and remembered behavior for the SDK version in the project.
The SDK provides several connection strategies to support different integration scenarios:
An IP address and network port, or a COM port, can be configured directly or selected from discovery results. To specify a target by SN or service ID, the SDK must first discover the corresponding terminal or service. Available target types depend on the platform SDK.
Applicable Scenarios
1.Device location is fixed
2.Network environment is stable (e.g., wired LAN)
3.Target connection parameters are known (e.g., IP address and network port, COM port, or Bluetooth MAC address)
When configuring a target using a known address or port, developers can skip discovery.
//LAN
RetailerSettingManager.destination(Destinations.terminalOnLan("192.168.1.123","8080"));
//Bluetooth
RetailerSettingManager.destination(Destinations.terminalOnBluetooth("11:22:33:44:55:66"));
// Replace the sample IP address and port with your target terminal's values.
RetailerSettingManager.Destination(Destinations.TerminalOnLan("192.168.1.123", "8080"));//LAN
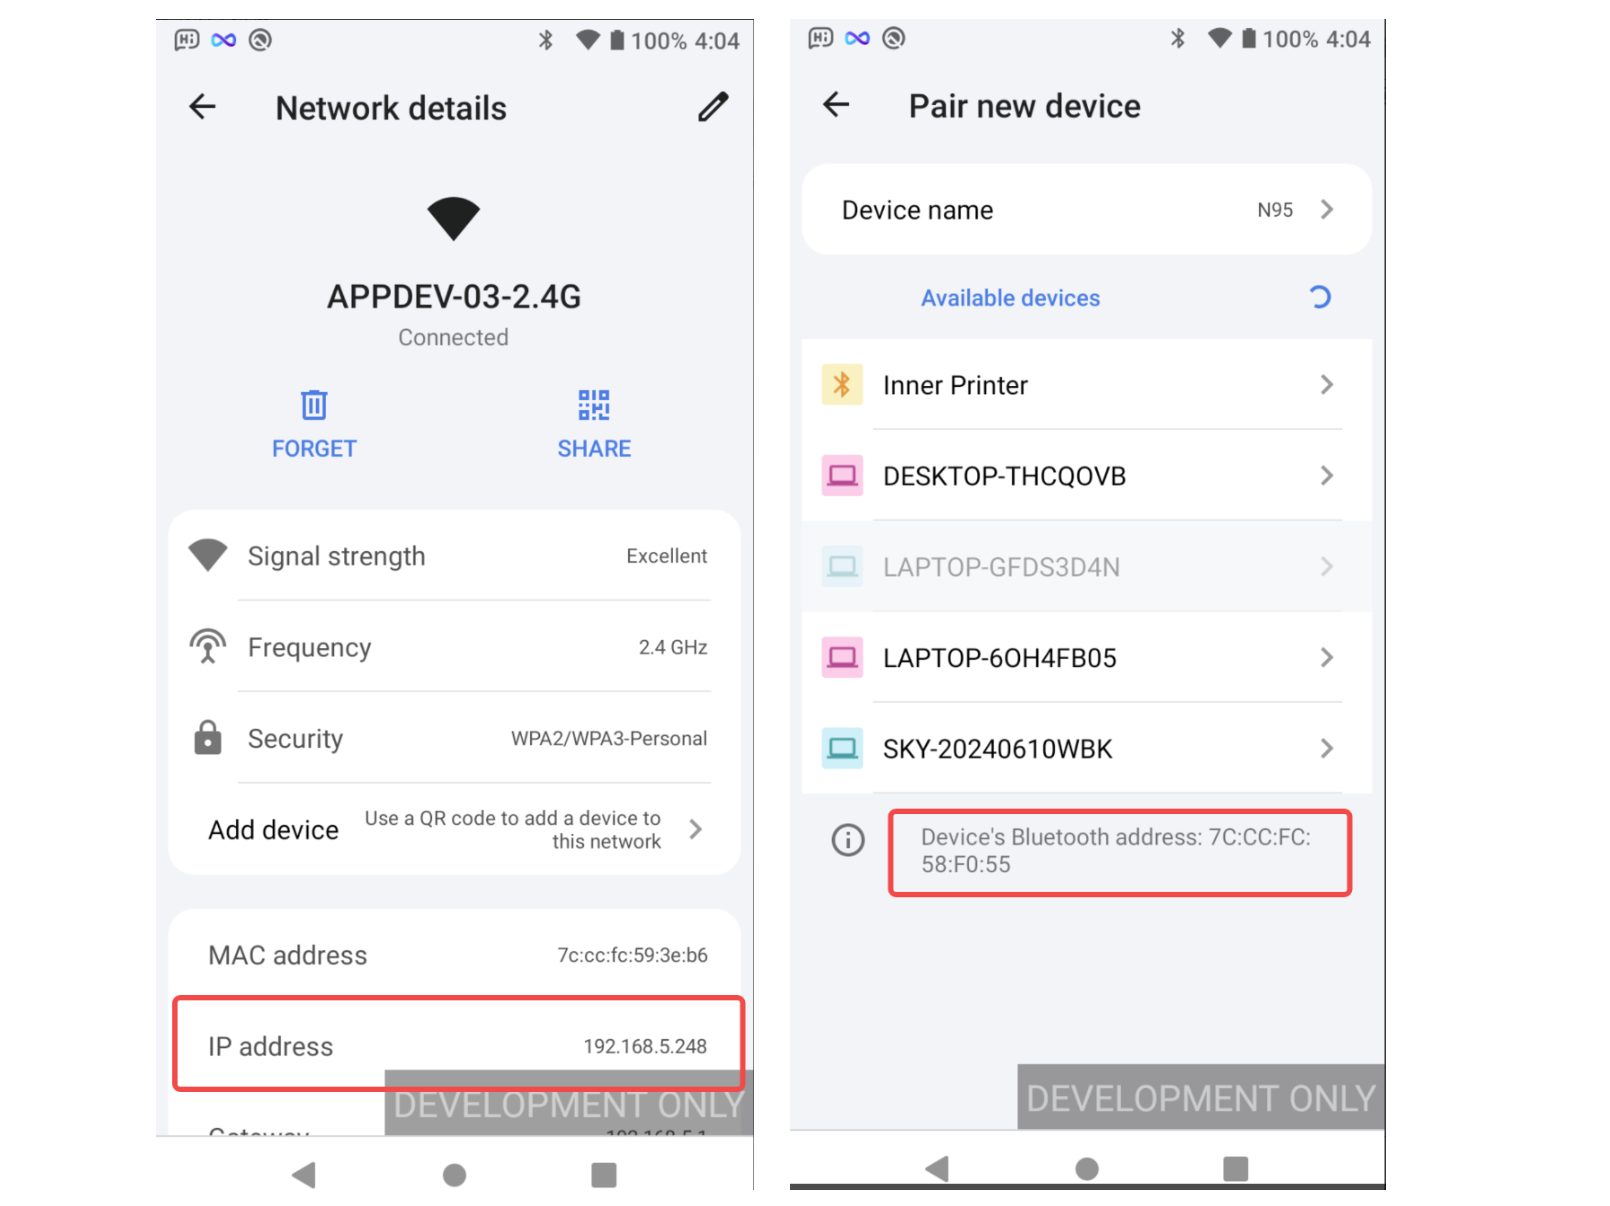
[[RetailerSettingManager sharedManager] destination:@"192.168.1.123" port:@"8080"];The required connection parameters (such as IP address, port, or Bluetooth MAC address) can be obtained in the following ways:
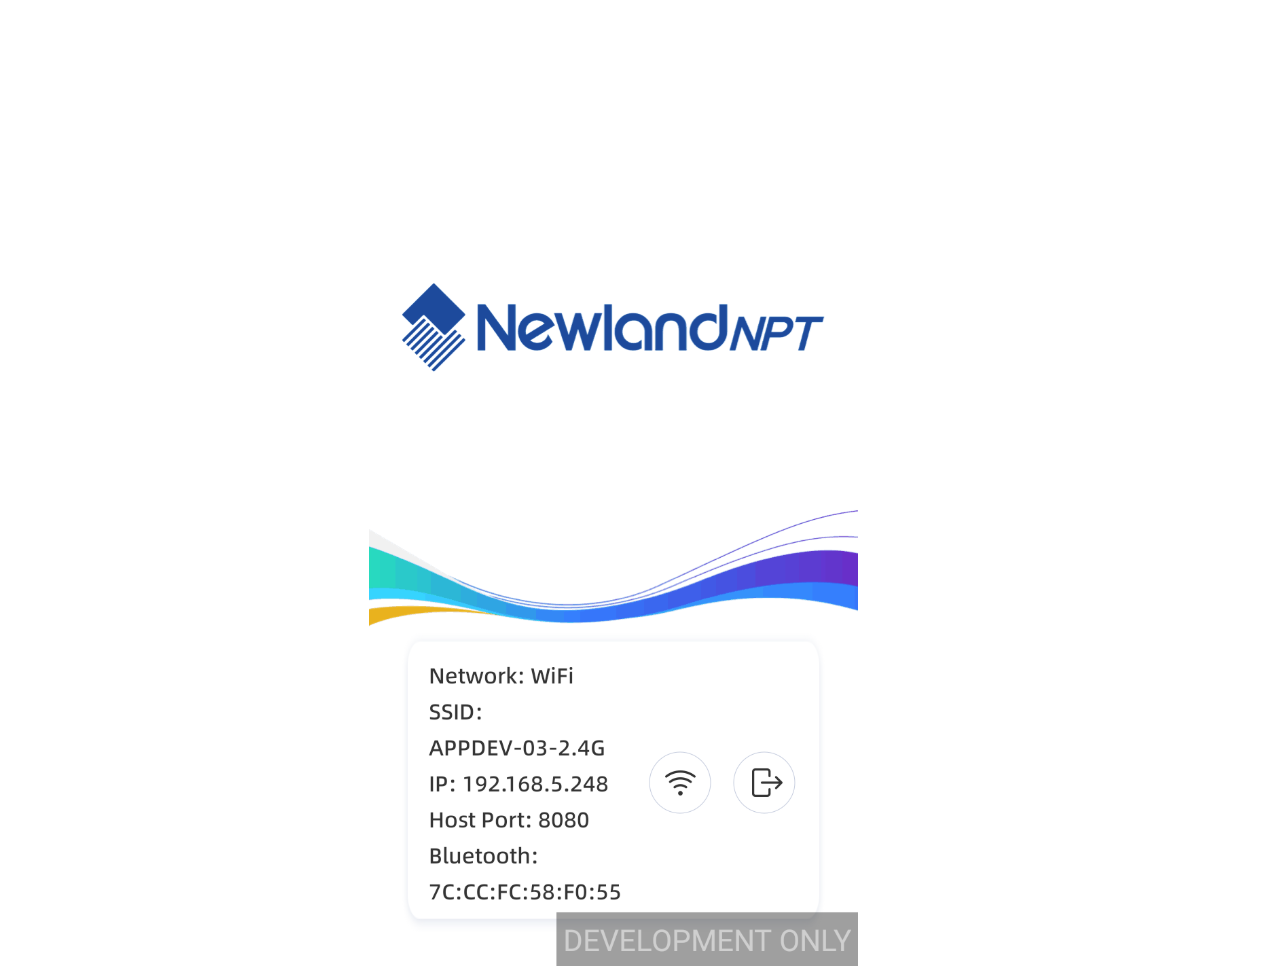
Follow these steps:
From the payment terminal launcher, open Settings. Access the required system configuration page:
The following examples show where to find the IP address and Bluetooth address.
The SDK provides the ability to discover nearby or network-accessible payment terminals.
Typical workflow:
Supported Discovery Methods:
The following examples set a target by SN after discovery.
// Start discovery (async callback)
RetailerSettingManager.startDiscover((List<DiscoveredTerminalInfo> devices) -> {
    devices.forEach(device -> {
        System.out.println(device.sn);
        System.out.println(device.communicationType);
        System.out.println(device.model);
    });
});

// Set preferred device
RetailerSettingManager.destination(Destinations.terminal(sn));

// Stop discovery
RetailerSettingManager.stopDiscover();
using System;
using System.Collections.Generic;
using PayExplorerConnect;
public void HandleDiscoveredTerminals(IReadOnlyList<DiscoveredTerminalInfo> terminals)
{
foreach (DiscoveredTerminalInfo terminal in terminals)
{
Console.WriteLine($"SN: {terminal.Sn}, communicationType: {terminal.CommunicationType}, model: {terminal.Model}");
}
}
public void StartTerminalDiscovery()
{
// Start discovery (async callback)
RetailerSettingManager.StartDiscoverServices(HandleDiscoveredTerminals);
}
public void SelectTerminal()
{
// Replace the sample SN with your target terminal's SN.
RetailerSettingManager.Destination(Destinations.Terminal("NDNL00017998"));
// Stop discovery
RetailerSettingManager.StopDiscoverServices();
}// Methods of an application-owned RetailerSettingManagerDelegate.
- (void)startTerminalDiscovery {
RetailerSettingManager *settings = [RetailerSettingManager sharedManager];
settings.delegate = self;
[settings startDiscoverServices];
}
- (void)onStartDiscoverServices {}
- (void)onStopDiscoverServices {}
- (void)onDiscoverTerminal:(DiscoverDeviceInfo *)terminal {
NSLog(@"sn = %@, model = %@", terminal.sn, terminal.model);
}
- (void)onDiscoverServices:(ServiceInfo *)service {
NSLog(@"terminal = %@, service = %@", service.deviceSn, service.serviceId);
}
- (void)selectTerminalWithSN:(NSString *)sn {
[[RetailerSettingManager sharedManager] destination:sn];
[[RetailerSettingManager sharedManager] stopDiscoverServices];
}
Device Filtering
Android and Windows expose terminal information as DiscoveredTerminalInfo. On iOS, terminal and service callbacks use DiscoverDeviceInfo and ServiceInfo, respectively. Keep the iOS delegate owner alive while discovery is active.
Filter devices by:
Discovery updates the available candidates; it does not bind the application to the first result. Select a target from the results, retain its identity or connection parameters in application settings if required, and stop discovery when the selection flow no longer needs it. A design that continues background discovery should give that work an application-level owner.
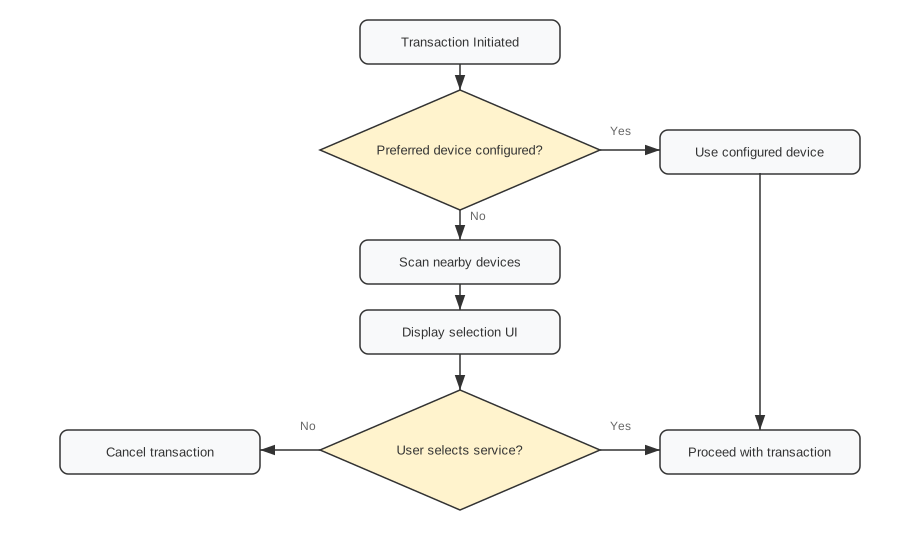
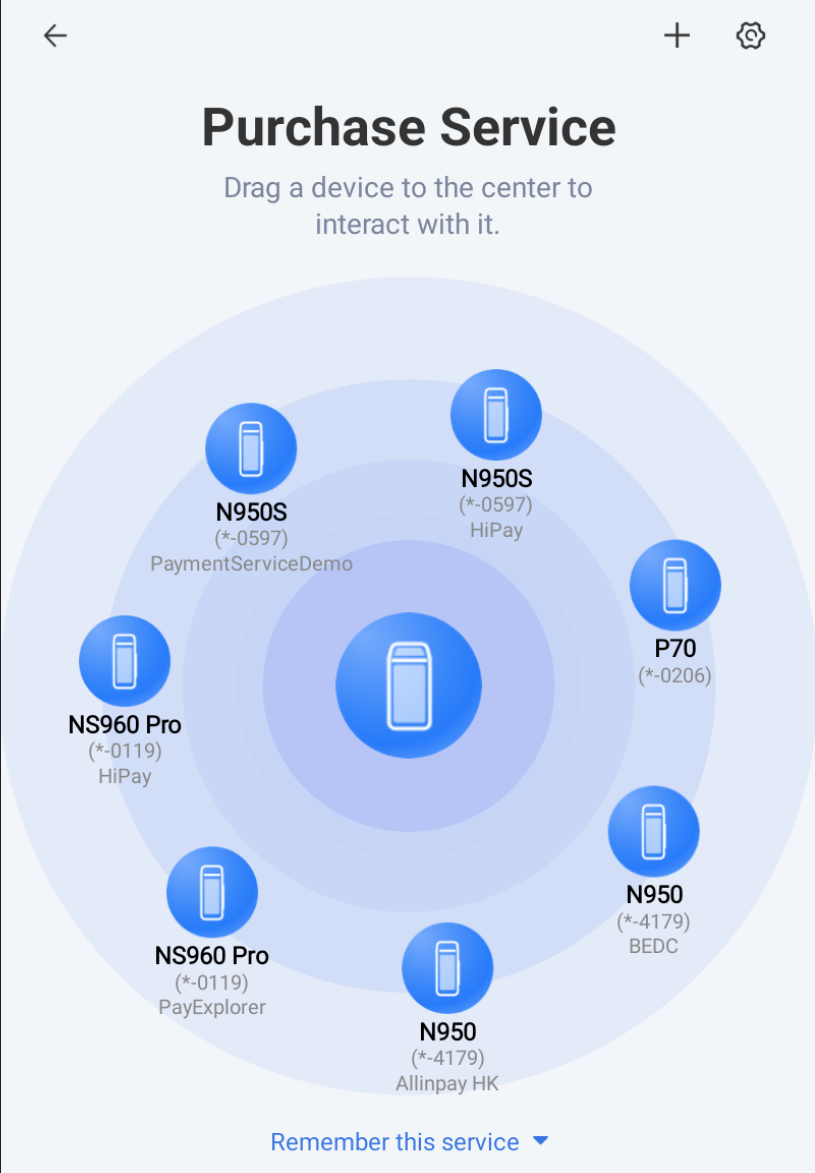
When a request has no explicit target and there is no applicable default or remembered choice, the SDK's selection flow can present available terminals or services supporting that request. Configure the available communication methods before using this flow. A remembered choice may allow later requests to proceed without showing the selection interface again.
The manual device selection interface is shown below:
| Setting | Purpose |
|---|---|
| Enabled communication methods | Define which channels the application can use. |
| Default target | Set a reusable terminal or service choice through the setting manager. |
| SDK remember options | Control reuse of a selection made through the SDK's selection flow. |
| Application settings | Store the application's chosen strategy, terminal identity, and connection parameters for restoration or editing. |
Keep application settings and SDK remember options consistent. When the application restarts, load its selected strategy, apply the required communication configuration, and restore an explicit target when that strategy uses one, meeting the discovery prerequisite for that target type. Confirm SDK-managed persistence on the target platform rather than assuming the same behavior across all platforms.
When switching terminals, update the application's selection, remove any obsolete remembered choice in the relevant scope, and apply the new target. If a saved target is unavailable, show the failure and allow reselection. A switch applies to subsequent requests; preserve the original request's identity and target when handling an operation already submitted.
When the payment terminal changes, update the application's saved selection; if SDK remember options are obsolete, clear only the relevant scope. Clearing a remembered option does not delete the application's own settings or establish the result of an ongoing request. For service-level and broader clearing scopes, see Service Routing.
RetailerSettingManager.clearRememberOption("sn");RetailerSettingManager.ClearRememberOptions("sn");[[RetailerSettingManager sharedManager] clearOptionWithSn:sn];
Manifest declarations belong in Add SDK Dependency. This section covers authorization when using Bluetooth at runtime.
When using Bluetooth communication, you need to dynamically request appropriate permissions based on the Android system version. Before calling any transaction API, the runtime Bluetooth permission request and authorization must be completed.
Non-Newland devices only need the minimum Bluetooth permission for the corresponding Android version:
BLUETOOTH_CONNECTBLUETOOTHString[] bluetoothPermissions;
if (Build.VERSION.SDK_INT >= Build.VERSION_CODES.S) {
bluetoothPermissions = new String[]{ Manifest.permission.BLUETOOTH_CONNECT };
} else {
bluetoothPermissions = new String[]{ Manifest.permission.BLUETOOTH };
}
if (ContextCompat.checkSelfPermission(this,
Build.VERSION.SDK_INT >= Build.VERSION_CODES.S
? Manifest.permission.BLUETOOTH_CONNECT
: Manifest.permission.BLUETOOTH)
!= PackageManager.PERMISSION_GRANTED) {
ActivityCompat.requestPermissions(this, bluetoothPermissions, REQUEST_CODE_BLUETOOTH);
}For Newland devices, in addition to the Bluetooth permissions above, the following permissions must also be declared in AndroidManifest.xml:
android.permission.MANAGE_ANALOG_SERIALandroid.permission.MANAGE_NEWLANDIf Bluetooth communication is not required, you can set the connection method through the following interface (only needs to be called once):
// Use LAN only
RetailerSettingManager.enableConnectMethod(ConnectionMethod.LAN);

// Use both LAN and USB
RetailerSettingManager.enableConnectMethod(ConnectionMethod.LAN, ConnectionMethod.USB);When a transaction is initiated without the required Bluetooth permission granted, the onError(int errCode, String errMsg) callback will return the following error:
errCode:-1003, errMsg:Permission denied: ["android.permission.BLUETOOTH_CONNECT"]Note: The runtime Bluetooth permission request must be completed before calling any transaction API.
When a transaction is initiated using a specified Bluetooth MAC address, if a connection timeout or connection failure occurs, the SDK will return error code -500 directly instead of displaying the service selection screen:
errCode:-500, errMsg:Failed to connect!